BATHTUB INSTALLATION
Bathtub installation has started to take prominence to most home. It is the place to run to after a busy day to soak and relax your muscles. You can install a bathtub in your house in an exciting bathroom, in the basement or in a newly constructed house to soak yourself.
We will help you with the installation of your bathtub.
Bathtubs are beneficial because it consumes little water as compared to overhead showers. It also eases the bathing of young children. Finally installing a bathtub in your house increase the value of your property.
- Bathtub removal and installation
- Bathtub installation method
- Bathtub installation at the basement
- Bathtub drain installation
- Installing a bathtub surround
- Three piece bathtub installation
- Bathtub tile installation
- Bathtub trap installation
- Install Bathtub valve
- Bathtub enclosure installation
- How to install fiberglass surround
- Install a bathtub surround
- What you need to install the surround
- Drywall installation
- Installing a Bathtub mortar base
- Bathtub liner installation
- Bathtub liner costs
- Bathtub measurements
- Bathtub faucet installation
- Screw on faucet
- 2handle bathtub faucet installation
- Install bathtub grab bars
- Bathtub installation kit
- Bathtub installation mats
- Bathtub installation plumbing
- Bathtub installation spray foam
- Install Bathtub Jacuzzi
- Steps on How to Install a Jacuzzi Tub
- Jacuzzi bathtub installation costs
- Bathtub Installation Tips
Bathtub removal and installation
Bathtub removal
You will first remove the tub surround or tile around the tub so that you can access the old tub. Locate the nails and screws that hold the tub on the wall and on the studs and remove them. Unscrew the drain stopper and with a screwdriver remove the overflow cover plate. Twist the drain remover from the tub. Twist and lift out the tub.
Installing the new tub
Ensure that the floor is clean. Try to level it with the thin set to make it level. Dry fit the tub on the floor. Use a foot level to check if its level. Add shims or foam at the bottom of the tub to make it level.
Bathtub drain installation
Assemble the drain kit that comes along with the bathtub. Place the bevel washer onto the overflow elbow, attach, and tighten the overflow plate well with mounting screws. Make sure you fix the rubber gasket. Place collars on the tubing. Install a rubber gasket between the tubing and the tub. Rub some plumbers’ putty on the drain flange slip it in the drain hole and screw it on the threaded elbow. Tighten it with needle nose pliers. Rub off excess putty with a piece of cloth. Attach the strainer to the drain flange with a mounting screw and tighten it sufficiently.
With assistance, slide the bathtub onto the enclave. Place the drain tubing at the correct position. The sound deadening should also be level. Place the drain outlet to the drainpipe. Connect drain outlet with p-trap. At this point, check for any leakages.
Use drywall screws and fender washers to attach to the tub to the studs using a screw gun. Be careful not to attach the screws on the flange tightly. We then proceed to the wall or surrounds of the bathtub.
Installing the bathtub
The tub has to sit on the mortar for stability purposes. Put mortar on the floor and spread it evenly to about 2 inches thick. Place the tub on that mortar and press it firmly so that it is level. Let it dry.
Drill holes on the lip of the tub corresponding to the stud positions if it does not have one. Use 2-inch screws to attach the tub to the studs. Constantly check the tub’s level using a foot level as you fix a screw on the wall and on the sides.
Bathtub installation method
How do I install my bathtub? This is a very common question that most homeowners have when I need a bathtub. Indeed, there are three different methods on how you can go about it. We have dropped in the method, alcove method and under mount method. The choice is yours. Let us discuss the various methods below.
1. Under mount method
In this type of tub, the rim rests on the decorated surface. The deck completely submerges the tub, and the deck acts as the tub opening as well. It comes in different sizes oval, square, shell heart made of materials like fiberglass acrylic or porcelain.
Steps
- Cut off the water supply by shutting the valves. If you got an existing tub, remove it and seal the drain.
- Check the floor level with foot level and repair the floor. Ensure the new tub sits on a structural fit ground.
- To build a subfloor, you can put joists on the floor then nail ¾’’ plywood on it using a nail gun. Be keen not to nail the plumbing or electric lines. To make the subfloor strong add a second layer of ½’’ plywood after spreading the liquid nail layer on the first subfloor.
- Let it dry before you start installing the tub.
- Mark the tub’s position on the subfloor using a tape measure. Attach legs on the bathtub and put in place the enclosure. Ensure that the tub rests on the floor properly. Insert wood shims under the tub until it is level. You can place mortar too around the legs and on the bare floor to make the tub steadier.
- Connect the tailpipe into the trap.
- Cut out the subfloor to shape out the drain. Use a jigsaw or a reciprocating saw. Then assemble the tub drain and the overflow together.
- To make it waterproof add silicone to the overflow and attach it to the tub the rubber gasket.
- Get the plywood dimensions from the template that came with the tub. Use Haber saw to cut the plywood and sand it for a smooth finish. Put plywood on the enclosure and screw it with I inch screws.
- Be keen to follow instructions from the manufacturer on the faucet and sprout installation.
- Run the water to check for any leaks.
- Secure the decking to the top of the tub. Insert 1-inch screws into the top plates.
- Install marble, ceramic tile or other water-resistant finish. Apply silicone sealant along the joints.
2. Drop-In method
This type of method is nice with whirlpools. The tub sits in a deck. Here you will build a deck that covers the whole tub underneath up to the lips of the tub. For the top of the deck, you can use a wider than the tub marble or tile to make it stylish.
You first need to build a deck for your tub. Take the measurement from underneath the tub’s lip to the bottom of the tub on the floor where the tub will rest. This is the depth measurement of the deck. Add an inch or two to that dimension. It is better if the deck’s height is taller you can add wooden shims to level it rather than it to be shorter there’s nothing to do.
Constructing the platform for a bath isn’t tough. However, it needs correct activity and cutting.
This project is incredibly easy for a carpenter; therefore, you will be served to rent out this part.
- Check the height of the platform that your tub requires and calculate the height of the platform wall studs.
For example, if the tub requires a 36-inch-high platform, cut the studs to 31 3⁄4 inches. This length is good for the top thickness and bottom 2-x-4 plate, the 3⁄4-inch plywood, mortar, backer board, and tile.
- Nail the studs to the top and bottom plates to form the walls for the platform.
- Secure the wall framework to the floor with nails, and use deck screws to cover the framework with plywood to make the deck.
- Cut an opening in the deck of the tub using a jigsaw. Either use the template provided by the manufacturer or after carefully marking the dimensions for the rough opening.
3. Alcove bathtub installation
Installing a bathtub can be a tedious activity but am here to walk you through the process. Actually, you can do it alone but in case, you a helping hand don’t shy off. Since it is an alcove bathtub, we need to mount the tub frame where the tub will rest on. Quite easy let’s delve in.
Things you will need
3- 4” foot level, Six inch level, Tape measure, drywall screws, screw gun, decker screws and screwdrivers, fender washers, channel locks, needle right hand, drain nose pliers, tape, utility knife, wood shims, overflow drain kit, plumbers’ putty, blanket if the floor needs leveling you may require leveling compound.
Tub framing
Alcove tub design is the most common one in many residential homes. The tub sits in a three-wall enclosure. The tub usually comes with a shower, and the faucet valve sits on one end wall.
Obtain the height and the width of the tub with a measuring tape. The tub should rest on the frame so construct the frame appropriately for three sides. Use two by-4 lumber to make walls. Place them. Cut two by four lumber to make the eight vertical studs for the walls that will go from the top to bottom. Place the horizontal lumbers sixteen inches on center between the vertical plates. Use a spirit level to check if the vertical studs are level. Use 3-inch-long screws to secure the sections together with a nail gun.
Attach the frame to the walls and the floor firmly with screws and construction adhesive. Connect them on the wall with adhesive and screws and on the floor.
Fixing the drain
Once the frame is in place, dry fit the tub and mark the drain positions. Following the manufacturers, guide, fix the drain kit on the tub. Make sure the drain orientation is correctly left to right the recommended one. If your drain service line is on the right, then you will need a right-hand drain tub and vice versa.
Ensure that you handle your tub with care because it is fragile. Do not drop a tool or put a ladder inside your tub; it will crack or chip. Cover the inside of a bathtub with a piece of cloth and the edges with the boxes.
Space preparation
Check the floor leveling with a foot level to ensure it is level. A correct drain level allows the water in the tub to drain. If the floor is not level, apply leveling compound bought from the hardware stores on the floor until it is completely level.
Place the bathtub on the enclave. Check if the tub is level. If it is not level, insert wooden shims under the tub until its level.
Tub fixing
Use the bathtub as a guide to mark studs positions on the enclave then remove the tub. The mark acts as a reference line for the stringer. Measure the tub flange. Use that measurement to mark the stronger position on the reference points you marked earlier.
Stringer is wooden crosspiece support on the bathtub frame, which will sit below the tub flange alongside the wall. Mark the studs on the top edge of the flange. The stringer should be under the tub. Fasten the stringer into place with deck screws.
Most bathtubs a have a sound deadening and level pad. Let them completely rest place them straight on the subfloor.
Bathtub installation at the basement
Placing a bathroom in the basement uplifts the home functionality. Installing a tub at the basement is more or less the same as installing the bathtub on the concrete floor. This can be a DIY job, or you can hire a contractor to do the work for you. The choice is yours.
Planning
The basement bathtub should be near existing utilities like the drainage system and the water supply pipe. The sewer drainage mostly depends on gravity to flow to the main sewer. At the basement, we definitely need a basement drain pump to uplift the water on the main sewer. Valves also come in handy to prevent backflow of sewer water.
Fixing a bathtub at the basement may require some excavation on the concrete or a cut out for the drainage system on the subfloor.
Install the wall
Depending on the space available at the basement, the most common bathtub installation is an alcove. The wall layout is made of 2 by 4-inch lumber or 2by 6 to lumber to make horizontal walls and vertical wall studs. The most ideal is the two by six lumber, which provides more plumbing space. Construct the wet wall framing for the tub. The frame should be the same size as the tub to make sure the tub fits in well. Fix it on the floor with screws to make it firm.
Position the bathtub on the floor make sure it fits well on to the frame. The flange holes should correspond with the vertical studs.
Pre-fit the drains and use mortar to fix it on the base of the floor. The tub has legs to let it rest at the right angle. Some tubs have holes at the bottom where the mortar fills in to keep the tub from shaking. Mix some mortar then lay it down floor or subfloor spread it around using a trowel. It should not cover the entire surface but good enough to fill the holes. It should be mostly in the center.
Place the tub on the mortar and secure it well with screws on the flange right into the frame. If the flange does not have, holes drill the holes then screw it to the vertical studs.
Install the tub surround making sure the end wall has provision for the valve and the faucets.
Make trenches on the concrete floor at the basement to connect PVC pipes from the bathtub to the main sewer line at the basement.
Install basement drainpipes that will take sewer water up to the sewer line.
Install water supply lines from the existing supply into the bathtub supply line with some copper piping.
After inspection from the city, authorities fill in the trenches. Pour in new concrete.
Do some electrical wiring and flooring if it was not there before.
Bathtub drain installation
In most cases, the drain kit comes as an accompaniment of the bathtub. The drain kit contains elbow, PVC pipe, and p trap.
Put all the pieces together temporarily and make sure they fit perfectly on the bathtub before you start assembling them on the bathtub. Make sure the bathtub holes fit in well with that of the drain kit. Great, it fits well.
Next, cement all the pieces permanently. Apply plumber’s primer on all joints inside and outside to make a permanent bond. The primer smell isn’t that friendly. Always ensure you prime the pieces outside where there is plenty of fresh air. Attach the upper elbow to a pre-cut PVC pipe to drain any overflow water down to the drain. From the PVC pipe then attach the p trap then fix the lower part that goes to the tub drain.
The top piece goes straight to the bathtub overflow hole at the top, and the bottom piece is at the bathtub drain hole. Place the overflow cover inside the tub and attach it to the upper part of the elbow with some screws. On the outside part of the overflow hole put a gasket first then the PVC elbow and tighten it.
At the bottom hole inside the tub, attach the tub stopper with the drain elbow on the outside with screws. The stopper is a push button stopper to allow water to fill in the tub. Rub around some plumbers’ putty on the stopper to make it watertight then fix it to the elbow.
Installing a bathtub surround
In the bathtubs, most people do not want bare plastered walls. Surrounds come in handy to add pomp and color to your walls making them magnificent and waterproof. That is installed in both new house or existing bathrooms. Fiberglass and plastic are the common materials used to make tub surrounds. The latter is cheaper.
Three piece bathtub installation
This is the most common bathroom. This is a bathroom with 3-piece wall surround. It has the end wall surround, which has provisions for the faucets and the valve, the right, and the left wall surround.
Tools and equipment: you need caulking gun, pencil, drill, adhesive for tub surrounds, hammer, hole-saws, tape measure, tub surround kit, masking tape, latex or acrylic caulk, trowel with V-shaped notches.
Steps
- When installing in an existing bathroom, you have to remove the faucet handle, showerhead, tub spout, and the faucet cover. In addition, put away any other thing that might cause interference of the tub surround like shelves, soap holder, towel holder.
- Square the walls first as it ensures a pleasant finish.
- Carefully mark the sprout location, faucet and the showerhead on the relevant surround wall. Use a hole saw to drill a hole for the faucet and tub spout.
- Mount the wall surround temporarily using masking tape and place the other end wall and the rear wall too.
- Use a utility knife to cut out any oversize wall and trim it on all the walls to make sure it uniform and the desired height.
- Mark the surrounding height on the walls using a pencil and remove all the surround walls.
- On faucet location, apply tub surround adhesive on the end wall using a trowel. While checking the pencil marks on top place the wall surround into the adhesive firmly. A little help of the masking tape will help the surrounding wall dry well. Repeat on the other end wall and the rear wall and put masking tapes too.
- Replace the faucet cover, faucet handle, tub spout, and the showerhead. Fix caulk beads at the meeting point of the surround and the tub, where the walls overlap at the tub spout and the faucet cover.
- Allow for 24 hours of drying before using the shower.
Bathtub tile installation
This procedure here shows you how to tile a bathtub deck. You will need the bucket, wet saw, laser level, 3/16 square notched trowel, tape measure, spacers, pencil and thin set.
Take measurements
Make measurements from the top of the tub deck about 11 and 7/8 ‘’ inches. Use a pencil to mark. Place the laser level
Tub deck support
To ensure the tiles get enough support on the deck attaches batten board. It also prevents them from falling.
Set the tiles
Mix a thin set in a bucket. Mix well to achieve a good consistency. Apply the thin set batter at the back of the tiles using the square notch trowel. To evenly place, the tiles put spacers as you set the tiles. Place tiles on top of the tub with a level to obtain the measure of the tile. Mark with a pencil. Let the tile will fall under the tub’s lip.
Tile cutting
Use a wet saw to cut the tiles. Spread a layer of thin set under the tile and place it under the lip of the tub. Finally, there you are with your tiles set.
Finally, yet importantly, place the tub in place and ensure it is level using the foot level. Use shims at the bottom of the tubs are not level. Secure the tub on the wall by screwing the flange on every stud. You are now set to install the walls around the tub.
Bathtub trap installation
All plumbing fixtures need a trap including our bathtub. For what use you may ask. The bottom of the trap always holds water right. This pool of water acts as a barrier of sewer gases to flow back into the drain system. It also holds other dirt and debris from clogging the drainage system. For our bathtub, we need a P-trap. It usually comes with the tubs drain kit. Attach the P-trap onto the PVC pipe with primers glue. It does not require any adaptors or fittings. Apply primers glue on the PVC pipe and the P-trap both inside and outside. Fit them together correctly and hold for 5 seconds.
Install Bathtub valve
Valves serve a very crucial role in regulating and stopping water flow. Most bathrooms have valves on the wall plumbing to control water flow.
Steps to Follow when Fixing a Valve
- On our fiberglass tub surround, we first determine the position of the shower valve. It usually approximately 45 inches depth and 15 inches in width.
- The brass area fits inside of the wall, and the chrome part pops out. That is what we usually the plaster guard slide on the outside on the wall.
- To attach the plastic cover on the wall, we have to drill holes on the wall. Drill a pilot hole on the fiberglass this will act as a guide for the larger drill to cut out a 3 and a quarter inch hole where the valve will fit in. Put the push fitting on the valve.
- Put Teflon tape on these fittings and tighten them with the crescent wrench.
- Before putting the valve on the wall, apply flux on the valve connections.
- Put the valve onto the wall through space might be small try not to drop it. However, you can tie wire on the valve so that you can easily pick it up when it falls.
- Put the valve on the shower riser first. Make sure the copper pipe pushes right inside about 1 inch.
- Solder on the copper pipes on the joints, ensure that you have a bottle of water to spray in case it catches fire.
- Let it cool down after soldering. Check to see the valve is the proper position. Before putting back the bathtub cartridge, turn on the water and check for any leaks.
Bathtub enclosure installation
You can choose a variety of bathtub enclosures to spruce up your bathroom. You can make a state of art enclosures with fiberglass, wood, corrugated metal sheet, wood, porcelain tiles, marble tiles among others.
How to install fiberglass surround
Check the walls if they are level and square. Install the back wall and ensure it rests well on the flush of the tub. Push the bottom of the wall a few inches so that it lies against the studs while you place the left wall panel. Wedge the left wall panel between the studs and the rear wall to ensure a tight corner seal. Do the same to the right wall panel.
Mark at the top of the wall on the stud with a pencil. Now put aside all the three walls. On each stud length going downwards apply adhesive. Peel the protective film from each wall. Place each wall panel starting with the back left then right. When all the seams are in place, press the walls firmly to bond with the adhesive on every stud.
Check all corners to ensure the seam is smooth and tight enough. Screw the end walls with the studs starting with the vertical flange on the pre-marked holes. Screw the top of each wall at the studs. To complete the tub put the faucet fixtures in place.
Install a bathtub surround
A tub surround renders the walls a smooth and even finish around the bathtub walls. Tub surrounds come as a single kit fitting into the tub size. They come as three pieces or five pieces. They are made of acrylic or fiberglass. Most surrounds come in to fit directly into the vertical studs. Some are the adhesive type of surrounds.
What you need to install the surround
Hole saws, tape measure, caulk gun, level, tub and tile caulk, marker, drill, and the tub.
Drywall installation
Are you tired of plaster and lather method in most interior walls? Drywall can be an alternative way out of the traditional normal walls. Install gypsum panels directly on walls studs. Drywall installation means the bathtub enclosure will be waterproof gypsum.
Get the horizontal measurements of the bathtub wall the rear wall, left and right wall.
Using a utility knife or drywall saw cut the drywall according to the measurements obtained.
Put the panels on the tub’s lip. Make sure it is level then draw a line where the flange will sit and cut out this area of drywall.
Locate the position of the faucet and the valve on the side drywall. Cut the holes using a drywall saw or a utility knife. Put it back to the wall framing ensuring the faucet and valve opening are in position. Before fixing it on the wall with screws, level the piece.
Fix the next two-drywall pieces to the wall frame using screws. Secure the screws 2 inches apart on the drywall edges and 8 inches apart. The dry walls need a nice finish so sand and tape all the joints and screws. Connect the faucets on the tub surround.
Installing a Bathtub mortar base
The mortar bathtub base will depend on the manufacturer’s instructions on a tub. If they recommend it well and good, you can proceed to make one.
Prepare the space where the tub will sit on the bathtub frame. It needs to be clean to make it level well.
Place the bathtub into place to assess what changes you need to make. Make sure the base is level. Put shims and mark on the studs to correct level position. Remove the tub and work on the floor base.
Attach drainage fitting on to the tub base. Put plumbers putty on the tub strainer and place a gasket on the drain tailpiece. Screw them together. Make sure the drain fits into the bathtub drain nicely.
Mix the mortar in a bucket and pour it onto the bathtub base. Spread it using the square-notched trowel. The mortar should have a height of 1 inch thick. Mortar should fill in the hole like fins to make the tub steady on the floor.
Place the bathtub on the mortar. Tighten the overflow drain and the base drain and attach it to the main drain line. Let it sit overnight on the mortar. Fix the tub flange on to the vertical studs with a caulk gun. Proceed with setting the wall surfaces, bathtub faucets, and the taps.
Bathtub liner installation
A good bathtub unit should last longer, but sometimes that is not the case. The acrylic or fiberglass can chip or cracks creating holes in the bathtub. Replacing the whole tub can be an expensive affair. However, there is a cheap option of replacing or refinishing with spray or polymer material the bathtub surface only or installing a liner on the tub. Liners are good they are a quick fix; require no demolition and cover up bad walls. On the other hand, they are a cover up to underlying problems and reduce dimensions of the bathtub.
A liner is a PVC plastic or acrylic piece designed to fit into the bathtub kit both the surround and the bathtub. Contact a firm to come to take measurements, and custom makes for you a liner that will fit into all the contours of the tub. The1/4 inch liner is made of acrylic just like the tub material but its thinner. It takes eight weeks for them to prepare the shell so just be patient.
Remove bathroom fixtures like taps, faucets and any drain fittings. Insert the shell into the old tub unit. Use two-sided tape and silicone adhesive to glue them together. Put in place the new drain, faucets fixtures. Great you have your bathtub refurbished, no more leakages.
Bathtub liner costs
Several factors such as materials, type of labor and location can affect the cost. Averagely a three-wall alcove liner for bathtub and surround cost €1200 to €1500.
Bathtub measurements
Alcove bathtubs measure 4 12 inches wide to 15 – 20 inches wide
Small bathtubs mostly fit in tiny rooms: measure 54 inches length, 30 inches width, and 15 inches height.
Medium size bathtubs have 72 inches length, 36 inches width and 20 inches height.
Oval bathtubs are 60 inches long, 40 inches wide, and 24 inches height
Whirlpool bathtubs are 60 inches long and 32 inches wide with a height of 18-23 inches height.
Bathtub faucet installation
You need a screwdriver. Check if the copper pipe is protruding on the wall properly. The wall should be clean and dry. If it is to slip on a faucet. Slide the new sprout on the copper pipe and tighten the screw with the hex wrench or a screwdriver. Seal the joint between the faucet and the tub with silicone.
Screw on faucet
Wrap the bathtub pipe with Teflon tape on the threads and fix the new nipple. Put the sprout on the pipe, tighten it with a screwdriver, and ensure it faces down. Squeeze a tube of silicone caulk at the faucet base to seal the joint. Let the caulk dry for more than 6 hours before using the faucet.
2handle bathtub faucet installation
To start ensure you have a faucet, crescent wrench and basin wrench, plastic container and piece of cloth. This is a very simple job.
Most bathrooms have three holes (shower, cold water, and hot water) on the wall, which are 3 inches apart. Close the shutoff valve. Completely, turn off the faucet to drain the bathtub. Disconnect all the water supply lines. Unscrew the nuts underneath and remove the faucet. Clean any areas that will meet the new faucet. Place the new faucet on the tub with the gasket. Lightly tighten the nuts check the alignment of the faucet and complete tightening with the hand. Connect the sink supply lines. The hot is on the left and the hot on the right. Use a wrench to tighten and open the shutoff valve let the water run for 15 minutes and check for any leaks.
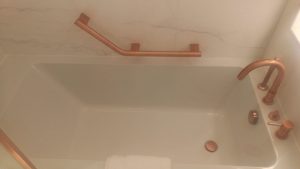
Install bathtub grab bars
Grab bars are an essential part of the bathtub especially for the disabled people. You can install them in either drywall or tiles. Grab bars come in different sizes and designs to suit your preference. There are three places to install the grab bars: next to the shower, in the tub and next to the toilet. Ours will be next to the tub. Get a vertical grab bar to determine where you want to fix the bar. The longer it is, the better since it will accommodate people of all heights. Locate the stud nearest to the shower using the stud finder and mark on both sides. Slide the bar covers, place the grab bar on the studs and mark with a pencil screws positions on each flange. Two should be on top of the flange and two at the bottom. Drill pilot holes and secure the screws with a screw gun. Then position the grab covers. There you go. You can go ahead and install another grab bar in shower horizontally or diagonally as you wish.
Bathtub installation kit
A four-piece tub kit include acrylic tub, two end panels, back wall panel
Bathtub installation labor costs.
It all depends on your project you may choose a handyman who charges €60 – €90 per hour or a licensed plumber costing €45 -€65 per hour. Installing a new bathtub may need 6 -9 hours, so that is €540 -€1,620. Removing an old bathtub requires 3 – 4 hours totaling to€270 – €540 and more. Plumbers who charge a fixed rate may cost €450 -€1,100 for bathtub installation, fixing of fixtures, faucets, drainage piping among others.
Bathtub installation mats
Gets a nice non-slip mat design with suction cups at the bottom ensuring a better grip? Clean the bottom of the tub where you will install the mat with any household cleaner. Let it dry completely. Without removing any backing material place the mat on the center of the tub and measure it if it is the right fit. Cut off if it is oversize. Place the mat again and mark the front edge. Peel the backing the line it with the mark you had put in the tub. Pull it down carefully from the front to the back to ensuring there is no air bubble. Caution do not use bleach on it and once awhile wash it and dry it outside.
Bathtub installation plumbing
Plumbing requires planning, preparing the site, installing the bathtub, connecting the fixture to plumbing and drainage
Bathtub installation spray foam
Insulating a bathtub is a common practice. It saves money and energy while preventing water from losing heating at the base and at the sides. Spray on foam is installation is usually done in between the walls and the bathtub.
After placing the bathtub on the frame, install a coat of spray foam to fill in the gaps between the walls and the panels. This also acts as a soundproof.
Install Bathtub Jacuzzi
A Jacuzzi is a perfect value-added thing to install in the home. A Jacuzzi is beneficial in the following ways,
- It raises body temperatures. It is very good in treating painful and sore muscles as the water jets out it massages the body.
- The bubbling hot water of the Jacuzzi raises body temperatures thus helps to improve blood circulation.
- It soothes the body and aids to improve physical and mental health.
- Hot baths provide steam therapy. When the steam is inhaled, it clears nasal passage and at the same time reducing inflation.
Jacuzzi tubs are complex systems. Unlike the normal bathtub, this one requires some electrical installation. Therefore, you will need to contact a certified electrician to do the wiring. Most of them are already set up. Thus they require no plumbing.
Steps on How to Install a Jacuzzi Tub
- Install a backer. A backer t is a wooden frame on which the tub will sit in between studs. Cut 2’’ by 4’’ lumber 16 inches long to fit in between the two studs on the wall.
- Apply mortar of 1 inch on the base of the frame. Make sure you use fiber cement. It caters well for the whirlpool vibrations.
- Put the tub on the mortar. Check the level using a foot level. Install the Jacuzzi tub.
- Place the tub at the center of the frame.
- Connect the overflow pipe to the tub’s drain and finally to the sewer drain. Secure the pipes by tightening the nuts well.
- Fix the tub plumbing to the existing pipe with copper fittings. Solder the tub plumbing on to the valve copper pipe. Fix the spout and faucets.
- Place the waterfall headset in the tub and tighten it with a wrench.
- Turn on the water; fill the tub to test the overflow drain. Seal all the leaking joints and re-tighten the nuts.
- Plug the tub electrical wiring to the electrical outlet.
Jacuzzi bathtub installation costs
Most Jacuzzis are expensive. They are luxury items not found it many homes. So their purchase price is high the same as the installation costs. The minimum cost is €600, and the maximum cost is €15,000 per unit.
Bathtub Installation Tips
- Always make sure you are wearing safety gear when cutting tiles and removing tiles on the wall.
- Ask someone to help you when handling the tub to prevent it from falling and cracking.
- Always start working from top to down when installing the tub surround.
- Always ensure when you purchase the right drain kit that will fit the tub nicely.
- Always wait for the mortar to dry before screwing it to the studs.